端到端:离线批量预估
Contents
端到端:离线批量预估#
Tip
请联系我们 获取关于 Ray Data 的帮助,Ray Data 是行业中离线批量预估速度最快、成本最低的解决方案。
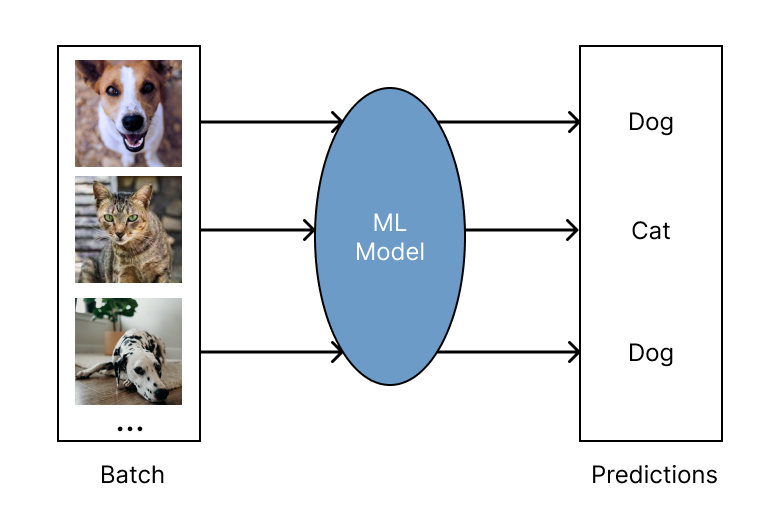
离线批量预估是在固定的输入数据集上生成模型预测的过程。Ray Data 为批量预估提供了高效且可扩展的解决方案,为深度学习应用提供更快的执行速度和更具成本效益的解决方案。
有关如何使用 Ray Data 进行离线批量预估的概述以及与其他解决方案的比较,请参见 Ray Data 概述。
快速开始#
首先,安装 Ray Data:
pip install -U "ray[data]"
使用 Ray Data 进行离线预估包括以下四个基本步骤:
步骤 1: 加载数据集到 Ray Dataset。Ray Data 支持许多不同的数据源和格式。有关更多详细信息,请参见 数据加载。
步骤 2: 定义一个 Python 类来加载预训练模型。
步骤 3: 通过调用
ds.map_batches()使用预训练模型转换数据集。有关更多详细信息,请参见 数据转换。
更多有关您的用例的深入示例,请参见 批量预估示例。 批量预估配置指南,请参见 配置指南。
from typing import Dict
import numpy as np

import ray

# Step 1: Create a Ray Dataset from in-memory Numpy arrays.
# You can also create a Ray Dataset from many other sources and file
# formats.
ds = ray.data.from_numpy(np.asarray(["Complete this", "for me"]))

# Step 2: Define a Predictor class for inference.
# Use a class to initialize the model just once in `__init__`
# and re-use it for inference across multiple batches.
class HuggingFacePredictor:
    def __init__(self):
        from transformers import pipeline
        # Initialize a pre-trained GPT2 Huggingface pipeline.
        self.model = pipeline("text-generation", model="gpt2")

    # Logic for inference on 1 batch of data.
    def __call__(self, batch: Dict[str, np.ndarray]) -> Dict[str, list]:
        # Get the predictions from the input batch.
        predictions = self.model(list(batch["data"]), max_length=20, num_return_sequences=1)
        # `predictions` is a list of length-one lists. For example:
        # [[{'generated_text': 'output_1'}], ..., [{'generated_text': 'output_2'}]]
        # Modify the output to get it into the following format instead:
        # ['output_1', 'output_2']
        batch["output"] = [sequences[0]["generated_text"] for sequences in predictions]
        return batch

# Use 2 parallel actors for inference. Each actor predicts on a
# different partition of data.
scale = ray.data.ActorPoolStrategy(size=2)
# Step 3: Map the Predictor over the Dataset to get predictions.
predictions = ds.map_batches(HuggingFacePredictor, compute=scale)
# Step 4: Show one prediction output.
predictions.show(limit=1)
{'data': 'Complete this', 'output': 'Complete this information or purchase any item from this site.\n\nAll purchases are final and non-'}
from typing import Dict
import numpy as np
import torch
import torch.nn as nn

import ray

# Step 1: Create a Ray Dataset from in-memory Numpy arrays.
# You can also create a Ray Dataset from many other sources and file
# formats.
ds = ray.data.from_numpy(np.ones((1, 100)))

# Step 2: Define a Predictor class for inference.
# Use a class to initialize the model just once in `__init__`
# and re-use it for inference across multiple batches.
class TorchPredictor:
    def __init__(self):
        # Load a dummy neural network.
        # Set `self.model` to your pre-trained PyTorch model.
        self.model = nn.Sequential(
            nn.Linear(in_features=100, out_features=1),
            nn.Sigmoid(),
        )
        self.model.eval()

    # Logic for inference on 1 batch of data.
    def __call__(self, batch: Dict[str, np.ndarray]) -> Dict[str, np.ndarray]:
        tensor = torch.as_tensor(batch["data"], dtype=torch.float32)
        with torch.inference_mode():
            # Get the predictions from the input batch.
            return {"output": self.model(tensor).numpy()}

# Use 2 parallel actors for inference. Each actor predicts on a
# different partition of data.
scale = ray.data.ActorPoolStrategy(size=2)
# Step 3: Map the Predictor over the Dataset to get predictions.
predictions = ds.map_batches(TorchPredictor, compute=scale)
# Step 4: Show one prediction output.
predictions.show(limit=1)
{'output': array([0.5590901], dtype=float32)}
from typing import Dict
import numpy as np

import ray

# Step 1: Create a Ray Dataset from in-memory Numpy arrays.
# You can also create a Ray Dataset from many other sources and file
# formats.
ds = ray.data.from_numpy(np.ones((1, 100)))

# Step 2: Define a Predictor class for inference.
# Use a class to initialize the model just once in `__init__`
# and re-use it for inference across multiple batches.
class TFPredictor:
    def __init__(self):
        from tensorflow import keras

        # Load a dummy neural network.
        # Set `self.model` to your pre-trained Keras model.
        input_layer = keras.Input(shape=(100,))
        output_layer = keras.layers.Dense(1, activation="sigmoid")
        self.model = keras.Sequential([input_layer, output_layer])

    # Logic for inference on 1 batch of data.
    def __call__(self, batch: Dict[str, np.ndarray]) -> Dict[str, np.ndarray]:
        # Get the predictions from the input batch.
        return {"output": self.model(batch["data"]).numpy()}

# Use 2 parallel actors for inference. Each actor predicts on a
# different partition of data.
scale = ray.data.ActorPoolStrategy(size=2)
# Step 3: Map the Predictor over the Dataset to get predictions.
predictions = ds.map_batches(TFPredictor, compute=scale)
 # Step 4: Show one prediction output.
predictions.show(limit=1)
{'output': array([0.625576], dtype=float32)}
更多示例#
配置和故障排除#
使用 GPU 进行推理#
要使用 GPU 进行推理,请对代码进行以下更改:
更新类实现以将模型和数据移入和移出 GPU。
在
ds.map_batches()调用中指定num_gpus=1以指示每个 actor 应使用 1 个 GPU。指定
batch_size以控制每个 actor 传递给__call__的输入批次的大小。
其余与 快速开始 相同。
from typing import Dict
import numpy as np

import ray

ds = ray.data.from_numpy(np.asarray(["Complete this", "for me"]))

class HuggingFacePredictor:
    def __init__(self):
        from transformers import pipeline
        # Set "cuda:0" as the device so the Huggingface pipeline uses GPU.
        self.model = pipeline("text-generation", model="gpt2", device="cuda:0")

    def __call__(self, batch: Dict[str, np.ndarray]) -> Dict[str, list]:
        predictions = self.model(list(batch["data"]), max_length=20, num_return_sequences=1)
        batch["output"] = [sequences[0]["generated_text"] for sequences in predictions]
        return batch

# Use 2 actors, each actor using 1 GPU. 2 GPUs total.
predictions = ds.map_batches(
    HuggingFacePredictor,
    num_gpus=1,
    # Specify the batch size for inference.
    # Increase this for larger datasets.
    batch_size=1,
    # Set the ActorPool size to the number of GPUs in your cluster.
    compute=ray.data.ActorPoolStrategy(size=2),
    )
predictions.show(limit=1)
{'data': 'Complete this', 'output': 'Complete this poll. Which one do you think holds the most promise for you?\n\nThank you'}
from typing import Dict
import numpy as np
import torch
import torch.nn as nn

import ray

ds = ray.data.from_numpy(np.ones((1, 100)))

class TorchPredictor:
    def __init__(self):
        # Move the neural network to GPU device by specifying "cuda".
        self.model = nn.Sequential(
            nn.Linear(in_features=100, out_features=1),
            nn.Sigmoid(),
        ).cuda()
        self.model.eval()

    def __call__(self, batch: Dict[str, np.ndarray]) -> Dict[str, np.ndarray]:
        # Move the input batch to GPU device by specifying "cuda".
        tensor = torch.as_tensor(batch["data"], dtype=torch.float32, device="cuda")
        with torch.inference_mode():
            # Move the prediction output back to CPU before returning.
            return {"output": self.model(tensor).cpu().numpy()}

# Use 2 actors, each actor using 1 GPU. 2 GPUs total.
predictions = ds.map_batches(
    TorchPredictor,
    num_gpus=1,
    # Specify the batch size for inference.
    # Increase this for larger datasets.
    batch_size=1,
    # Set the ActorPool size to the number of GPUs in your cluster.
    compute=ray.data.ActorPoolStrategy(size=2)
    )
predictions.show(limit=1)
{'output': array([0.5590901], dtype=float32)}
from typing import Dict
import numpy as np
import tensorflow as tf
from tensorflow import keras

import ray

ds = ray.data.from_numpy(np.ones((1, 100)))

class TFPredictor:
    def __init__(self):
        # Move the neural network to GPU by specifying the GPU device.
        with tf.device("GPU:0"):
            input_layer = keras.Input(shape=(100,))
            output_layer = keras.layers.Dense(1, activation="sigmoid")
            self.model = keras.Sequential([input_layer, output_layer])

    def __call__(self, batch: Dict[str, np.ndarray]) -> Dict[str, np.ndarray]:
        # Move the input batch to GPU by specifying GPU device.
        with tf.device("GPU:0"):
            return {"output": self.model(batch["data"]).numpy()}

# Use 2 actors, each actor using 1 GPU. 2 GPUs total.
predictions = ds.map_batches(
    TFPredictor,
    num_gpus=1,
    # Specify the batch size for inference.
    # Increase this for larger datasets.
    batch_size=1,
    # Set the ActorPool size to the number of GPUs in your cluster.
    compute=ray.data.ActorPoolStrategy(size=2)
    )
predictions.show(limit=1)
{'output': array([0.625576], dtype=float32)}
配置批量大小#
通过设置传递给 __call__ 的 ds.map_batches() 的 batch_size 的参数来配置输入批次的大小。
增加 batch_size 会导致更快的执行,因为推理是一个矢量化操作。对于 GPU 推理,增加 batch_size 会增加 GPU 利用率。将 batch_size 设置为尽可能大,而不会耗尽内存。如果遇到内存不足错误,减小 batch_size 可能有所帮助。
import numpy as np

import ray

ds = ray.data.from_numpy(np.ones((10, 100)))

def assert_batch(batch: Dict[str, np.ndarray]):
    assert len(batch) == 2
    return batch

# Specify that each input batch should be of size 2.
ds.map_batches(assert_batch, batch_size=2)
Caution
默认的 batch_size 为 4096,对于具有大行的数据集(例如,具有许多列的表或大图像集合)可能太大。
处理 GPU 内存不足故障#
如果您遇到 CUDA 内存不足问题,则您的批处理大小可能太大。按照 以下步骤 减小批量大小。
如果您的批量大小已设置为 1,则使用较小的模型或具有更多内存的 GPU 设备。
对于使用大型模型的高级用户,您可以使用模型并行性将模型分片到多个 GPU 上。
优化昂贵的 CPU 预处理#
如果您的工作负载除了模型推理之外还涉及昂贵的 CPU 预处理,您可以通过将预处理和推理逻辑分离到不同的阶段来优化吞吐量。这种分离允许批量推断 \(N\) 与批处理预处理同时执行 \(N+1\) 。
有关在单独的 map 调用中进行预处理的示例,请参见 使用 PyTorch ResNet18 进行图像分类批量推理。
处理 CPU 内存不足故障#
如果 CPU RAM 不足,则可以能在同一节点上并发运行太多模型副本。例如,如果
模型在创建/运行时使用 5 GB 的 RAM,并且一台机器总共有 16 GB 的 RAM,则最多可以同时运行
三个这些模型。Ray 的默认资源分配(每个任务/actor 一个 CPU)可能会导致此类情况下的 OutOfMemoryError。
假设您的集群有 4 个节点,每个节点有 16 个 CPU。 为了限制每个节点最多有 3 个这些 actor,您可以覆盖 CPU 或内存:
from typing import Dict
import numpy as np

import ray

ds = ray.data.from_numpy(np.asarray(["Complete this", "for me"]))

class HuggingFacePredictor:
    def __init__(self):
        from transformers import pipeline
        self.model = pipeline("text-generation", model="gpt2")

    def __call__(self, batch: Dict[str, np.ndarray]) -> Dict[str, list]:
        predictions = self.model(list(batch["data"]), max_length=20, num_return_sequences=1)
        batch["output"] = [sequences[0]["generated_text"] for sequences in predictions]
        return batch

predictions = ds.map_batches(
    HuggingFacePredictor,
    # Require 5 CPUs per actor (so at most 3 can fit per 16 CPU node).
    num_cpus=5,
    # 3 actors per node, with 4 nodes in the cluster means ActorPool size of 12.
    compute=ray.data.ActorPoolStrategy(size=12)
    )
predictions.show(limit=1)
使用 Ray Train 中的模型#
经过 Ray Train 训练的模型可以通过 Ray Data 使用 Ray Train 返回的 Checkpoint 进行批量预测。
步骤 1: 使用 Ray Train 训练模型。
import ray
from ray.train import ScalingConfig
from ray.train.xgboost import XGBoostTrainer

dataset = ray.data.read_csv("s3://anonymous@air-example-data/breast_cancer.csv")
train_dataset, valid_dataset = dataset.train_test_split(test_size=0.3)

trainer = XGBoostTrainer(
    scaling_config=ScalingConfig(
        num_workers=2,
        use_gpu=False,
    ),
    label_column="target",
    num_boost_round=20,
    params={
        "objective": "binary:logistic",
        "eval_metric": ["logloss", "error"],
    },
    datasets={"train": train_dataset, "valid": valid_dataset},
)
result = trainer.fit()
步骤 2: 从训练 Result 中提取 Checkpoint 。
checkpoint = result.checkpoint
步骤 3: 使用 Ray Data 来进行批量预测。要从 Checkpoint 中加载模型到 Python 类中,请使用与用于训练模型的 Trainer 对应的方法。
Deep Learning Trainers: Saving and Loading Checkpoints
Tree-Based Trainers: Save and load XGBoost and LightGBM checkpoints
在本例中,使用 XGBoostTrainer.get_model() 加载模型。
其余逻辑与 快速开始 相同。
from typing import Dict
import pandas as pd
import numpy as np
import xgboost

from ray.train import Checkpoint
from ray.train.xgboost import XGBoostTrainer

test_dataset = valid_dataset.drop_columns(["target"])

class XGBoostPredictor:
    def __init__(self, checkpoint: Checkpoint):
        self.model = XGBoostTrainer.get_model(checkpoint)

    def __call__(self, data: pd.DataFrame) -> Dict[str, np.ndarray]:
        dmatrix = xgboost.DMatrix(data)
        return {"predictions": self.model.predict(dmatrix)}


# Use 2 parallel actors for inference. Each actor predicts on a
# different partition of data.
scale = ray.data.ActorPoolStrategy(size=2)
# Map the Predictor over the Dataset to get predictions.
predictions = test_dataset.map_batches(
    XGBoostPredictor,
    compute=scale,
    batch_format="pandas",
    # Pass in the Checkpoint to the XGBoostPredictor constructor.
    fn_constructor_kwargs={"checkpoint": checkpoint}
)
predictions.show(limit=1)
{'predictions': 0.9969483017921448}